Project Life Tutorial: One Photo, multiple pockets
"How do you put one large photograph over multiple pockets?"
This is probably the question I get asked the most when it comes to Project Life. I love featuring one big photograph on a 12x12 page, so how can you create this effect on the Project Life App?
The short answer is through trial, error, and lots practice. But there are a few tricks that can make it a little bit easier, to begin with.
Using only the Project Life App
Step 1: Selecting the Photo
If the photo has too much detail to match up, I struggle and can be there for hours. When starting out, I suggest either using an image with a lot of negative space or enlarging over a couple of pockets.
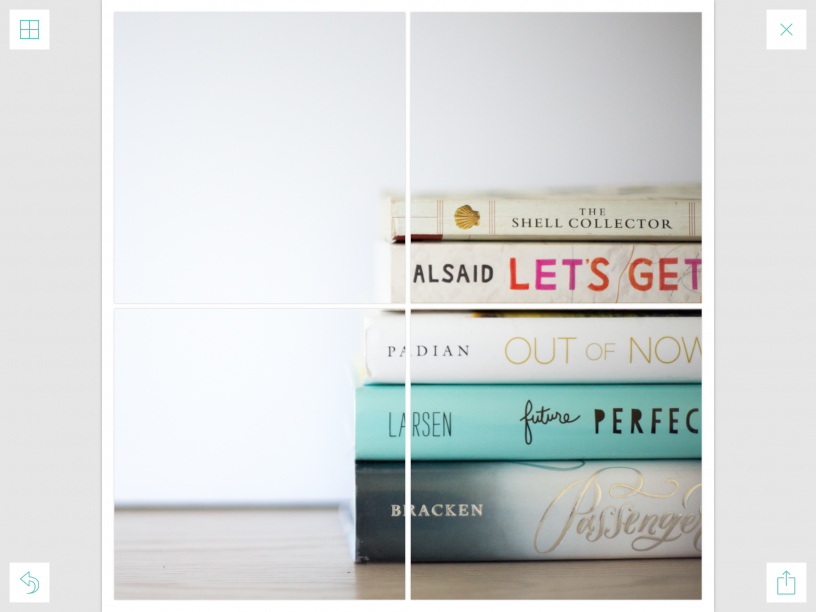
For this example, I'll be using this photo of books and Design E Photo Pocket Page.
Step 2: Crop your photo
It is so much easier to enlarge the photo when it is square. You can do this in photo editing on your phone, by opening the photo in the 12 x 12 photo collage in the Project Life app or in PicTapGo/ another photo editing app.
After selecting "edit" in "Photos", I choose the Square crop.
Photo 08-08-2016, 23 10 31
Step 3: Import photo into each pocket
Photo 08-08-2016, 23 11 32
Open the Project Life App and import the same photo into each pocket. It will look a bit like this:
Step 4: Start with the corners
As you zoom into or enlarge the photo, make sure you keep the bottom right corner of the photograph in the bottom right corner. The same for the top left and so on.
Photo 08-08-2016, 23 11 42
Step 5: Match up photos
You'll notice if you flick back to the last photo that I have had to adjust the zoom level to get the photos to match. It really is a case of trial and error.
The bottom left photo is the one I am focusing on in this image. I have zoomed in so that the text on the bottom left roughly matches the size of the text in the bottom right. I have found aligning up the little details like this helps. Once I am happy, I then start to move the image across until it lines up with the photo next to it.
Photo 08-08-2016, 23 12 30
Step 6: Make any necessary adjustments
Keep adjusting until you are happy with the look. Once you feel confident matching up 4 pockets, then try using a page layout with more pockets. It really is a case of practice makes perfect.
Photo 08-08-2016, 23 14 12
Using Photoshop Elements and the Project Life App
This is perhaps the easier option and the method I favour if the photograph has a lot of detail that I struggle to match up in the app alone. I edit my photos in Photoshop Elements and then import them to the app via Dropbox.
In Photoshop Elements I crop the 12 x 12 photo into 8 pieces. This is the method that works for me every time. There might be other ways to accomplish what I am doing but this is the method I keep coming back to.
Step 1: Crop photo to 12 in x 12 in
Step 2: Create a 6x4 Rectangle guide
Using the rectangle tool, I create a fixed size rectangle measuring 6in x 4in. This serves as a guide so I can easily crop the image to 6in x 4 in.
Step 3: Crop photo using the guide
Select the crop tool and make sure you are cropping in the ratio of 6in x 4 in. In the space next to the guide, I then draw out the rectangle to fill the gap. Once happy that I am reaching each edge I click the green tick.
Step 4: Flatten Image
After you have cropped the image, you're left with two layers. The guide that isn't visible and the cropped photo. I click "Layer" at the top and then "flatten image".
Step 5: Save As
I title the image according to the pocket number. This makes it easier to fit the jigsaw together again in the app. Once the image is saved I don't close it. I "undo" or command and z until I'm back to the square photo with the rectangle guide. I then move the rectangle guide and repeat steps 3 & 4 until all the 4x6 photos have been cropped.
Step 5: crop the 3x4 images
To crop the 3x4 images, I have found it easiest to create a second rectangular guide. I then crop a 3x4 rectangle between the two guides and repeat steps 3-5.
Step 6: Upload to Dropbox
For me, this isn't an additional step to my normal Project Life process. I use my DSLR photographs and import them to the app from Dropbox. It's just how I roll.
Step 7: Open each photograph in the corresponding space in the App
I hope this has been clear. If you are still confused, comment below and I'll see if I can explain any better.


